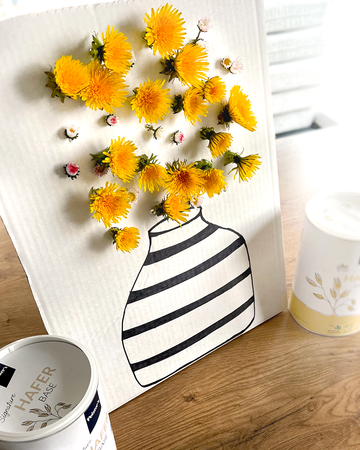
It's the beginning of May and spring is at its best. The flowers are blooming and the birds are chirping busy. In the past few days my children have been enthusiastically picking small bouquets of flowers. In keeping with this, a mom from our Pelster's Community had a great idea for a DIY project: a colorful flower vase filled with flowers . One of our shipping boxes was quickly recycled for the craft project.

The design possibilities are endless and leave plenty of room for creativity - be it in shape, color or size. It becomes particularly exciting when the freshly picked flowers are pushed through the punched holes, creating a cheerful play of colors.
Even though these flower vases don't last long, they are fun to use on sunny days and are a nice addition to nature walks. They also keep little ones' hands busy and promote fine motor skills.
For this you need:
- Scissors
- felt-tip pens
- a disused shipping box
- Flowers
That's how it's done:
To implement this creative idea, you first need a shipping box. Cut out a large area from this to create a rectangular frame.
In the next step you can either paint a vase on the cardboard yourself or let the children design their own vase.

Now use scissors to punch out holes for the flower stems above the vase.

Now you can start picking and planting diligently.
Tip: If you want to give the vase as a gift, I recommend fixing the flower stems on the back with an adhesive strip to ensure that they remain stable during transport.
Lion head modification: Alternatively, cut out the cardboard in a circle and draw a lion's face in the middle. Now design the lion's mane with the flowers. https://youtube.com/shorts/9s36bMqhQc8?feature=share
Have fun crafting!
Your Anika